MiSTer FPGA - Initial Setup
This guide assumes you know what a MiSTer FPGA is, what it does and what it comprises of.
Before we can use the MiSTer, we need to prepare the micro SD card with the MiSTer image.
Hardware you will need :-
- DE-10 Nano
- Micro SD card
- USB-OTG Cable
- Powered USB hub - Can be un-powered if just using with standard keyboard and mouse however not recommended.
- USB keyboard
- OPTIONAL RAM module - This is technically optional as the MiSTer platform itself works perfectly well without it as do many cores. Many cores however (likely the ones you're most interested in), require 32mb minimum in order to work.
We're going to use mr-fusion to make our lives easier. There really is no benefit to doing this manually.
Download the latest mr-fusion image and write it to a micro SD card using your application of choice. If you don't have any software installed for this, Balena Etcher is one suggestion that works on all platforms.
Once you've written the image, pop the sd card into the DE-10 Nano, connect HDMI, power, USB-OTG cable and USB keyboard.
Connect power to the DE-10 and it should boot to the following screen :-
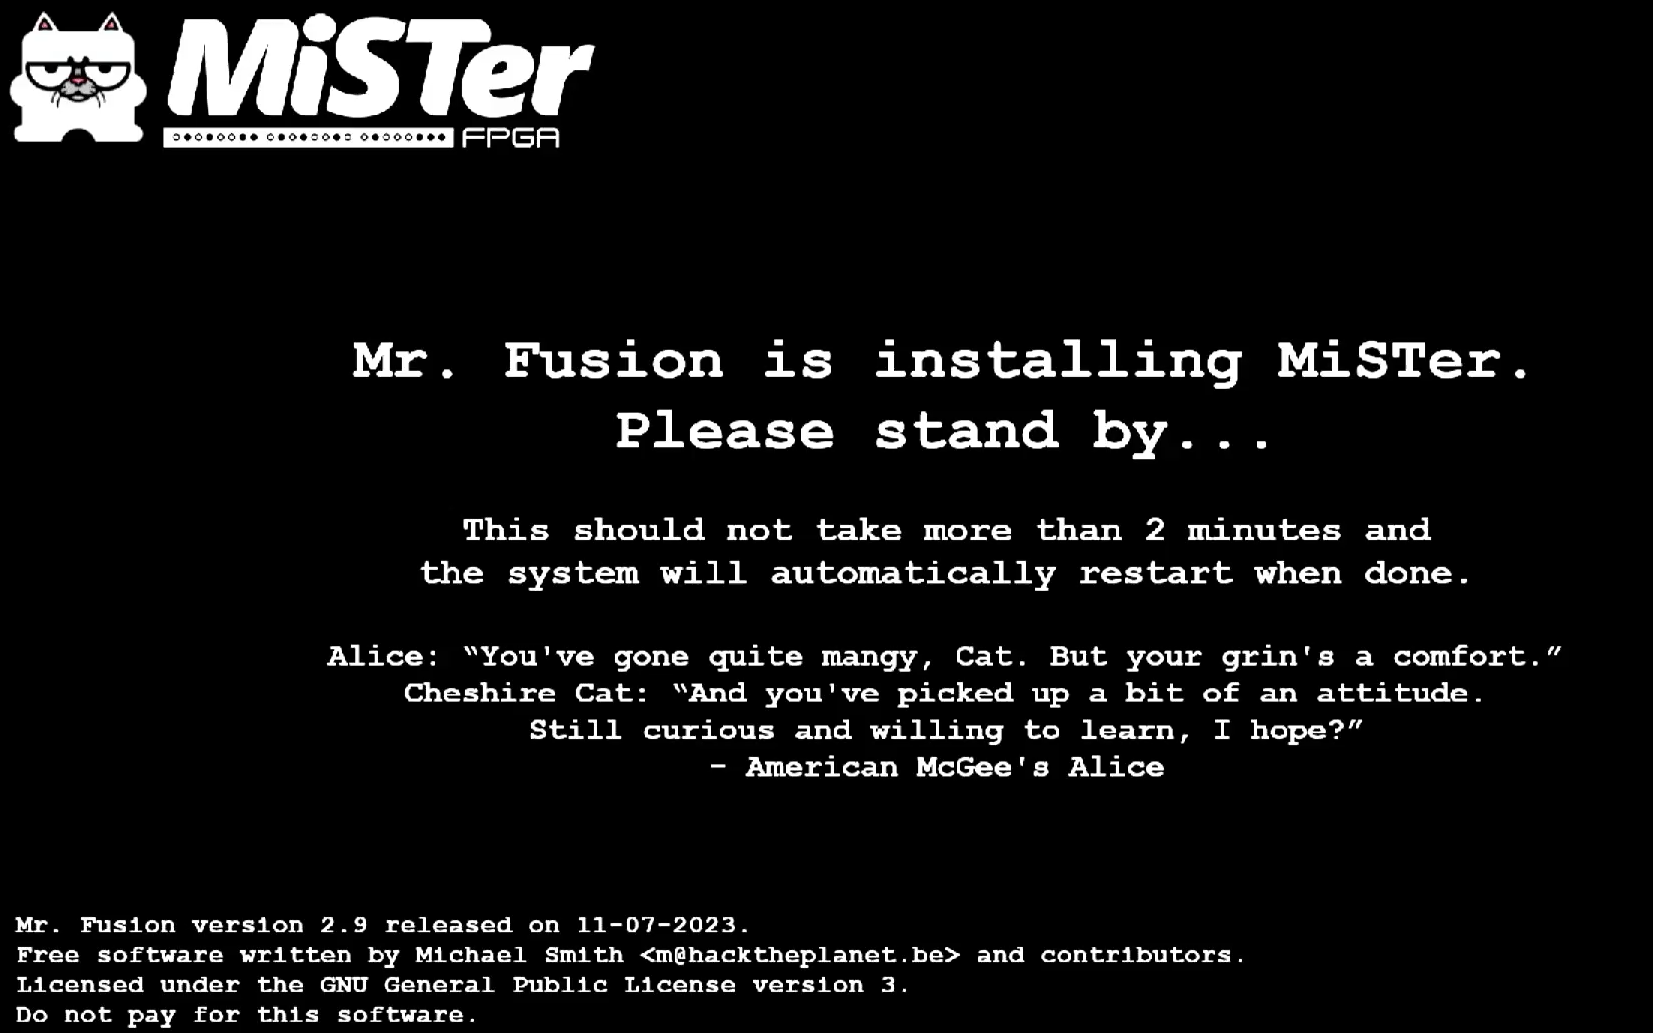
If you don't see the image above, ensure that the SD card is inserted / imaged correctly etc or try a different SD card.
When you do see the screen, wait a few minutes while mr-fusion does its thing and then the system will reboot.
Once it boots to the following screen, you officially have a MiSter of your own.
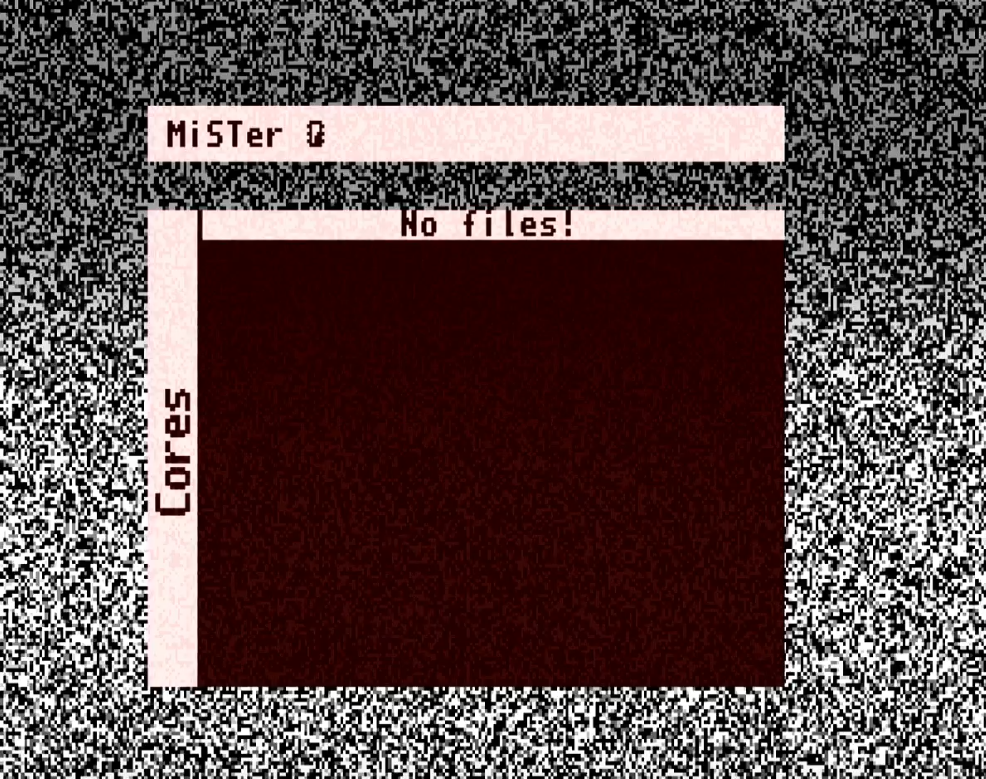
Your icon next to the MiSTer lettering at the top might look different depending on how much external RAM you have installed. I'm currently running 32mb.
As you can see from the image, there are no files therefore nothing to do. Boo. Let's fix that but first, if you're not a fan of the static (though moving...) background, press the F1 key to cycle through several included images. (This will explain why the following screen shots have a different background)
Now we need to connect to a network. I'm using a wired connection but I'll show you how to connect to wifi too.
If you plug in a cable, you'll notice a new icon next to the RAM icon to signal that you're connected to the network. If you're going wifi don't worry, follow the next couple of steps.
Press F12 on your keyboard to bring up another menu which looks like this...
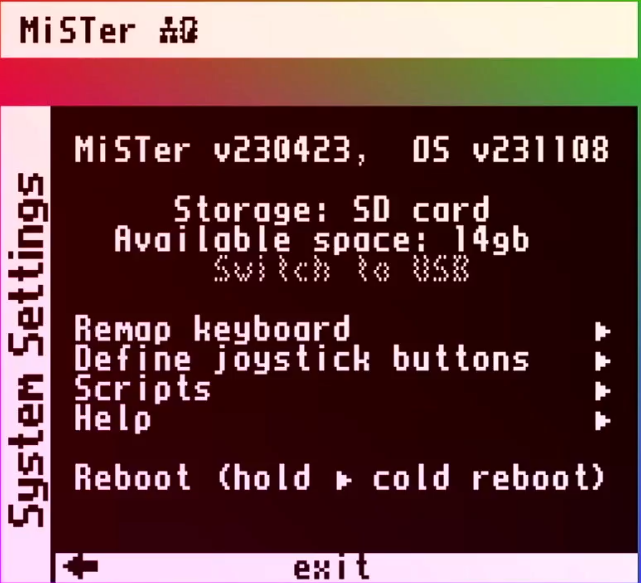
Using the arrow keys on your keyboard, navigate up to the Scripts option and press Enter. You will then be greeted by the following screen...
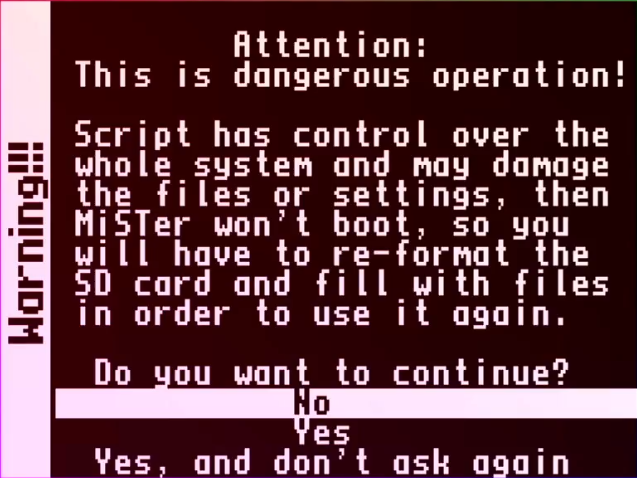
At this point you can either select yes or yes and don't ask again. I choose the latter so that it doesn't nag me every time I want to run a script. It's not so much a "Here be dragons" warning, more of a "Don't go gung-ho unless you want to break things" kind of warning.
Once you've agreed, you'll have only two options (correct at time of writing), update and wifi.
Select wifi if you wish to connect to a wireless network otherwise select Update.
This process will take a short time so go and give your eyes a rest and grab a drink or something.
After updating, the MiSTer will reboot again but this time you'll be presented with a screen that looks more like this...
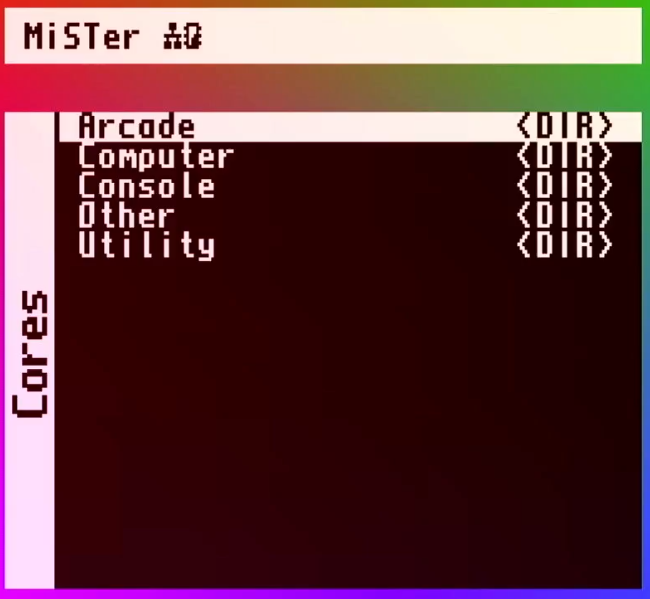
This is the main interface. From here you can select which system you wish to run. Keep in mind that there are no roms etc just yet so while you can run something like a C64, you can't do much with it.
We have several options for rom storage. We can use the SD card to hold our roms / VHDs etc which is perfectly fine. If you don't have a huge SD card there are other options. One way is to host the files on a network share and connect to it from the MiSTer (Guide coming shortly). The method I use is to store everything on an external SSD drive connected via USB.
I'll show how to use SD and / or eternal drive now and then cover network shares in a later article.
Power off the MiSTer and eject the SD card then pop it into your computer and open it up. On the root of the drive is a folder called "games". Inside this folder is a subfolder for each core. The names are fairly self explanatory but you can refer to the wiki for more information.
If you're copying the files onto SD card, this is where they need to go. Copy the roms you want into the correct folders. Once the roms are on the SD card. Re-insert it into the MiSTer and power up.
If you've opted for external storage, you'll need to format it to FAT32. Once formatted, copy the games folder from the SD card onto the root of the hard drive to ensure that the subfolder names remain correct. You can now copy your roms into their respective folders.
Now re-insert the SD card and connect the USB drive before powering on the MiSTer.
Select a core from the menu and then press Enter to run it. Depending on which core you ran depends on whether you see anything on screen or not. Press F12 to bring up the core menu and from there you can select a rom, floppy image etc.
It's time now for you to explore the system and the ecosystem surrounding it. The MiSTer FPGA wiki has good documentation and there are a squillion Youtube videos covering every aspect so you won't get bored.
Until then, enjoy playing with your....erm.... Mr?